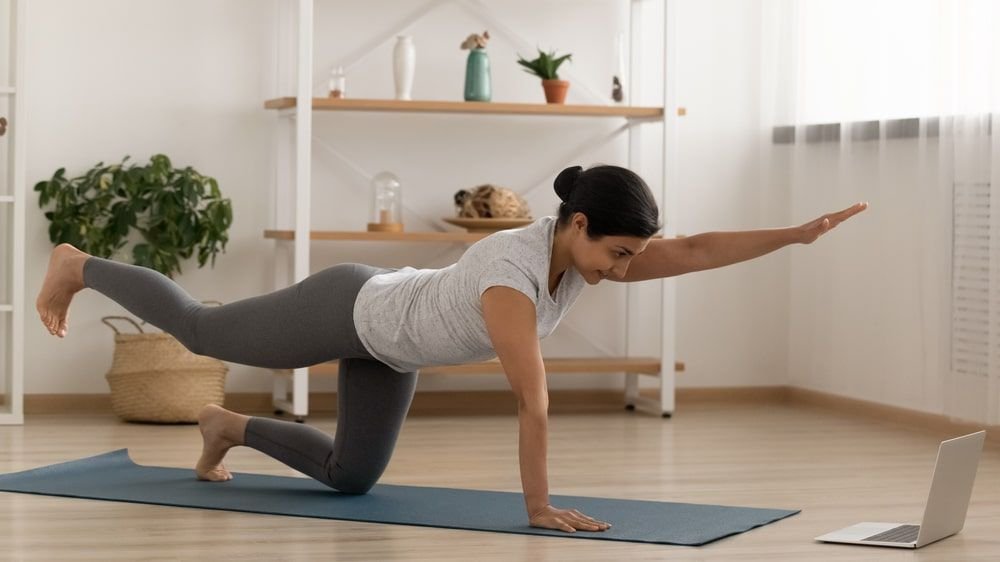
15 minutes at-home Pilates workout for full body
15 minutes at-home Pilates workout for full body In our fast-paced world, finding time for exercise can be challenging. The good news? Just 15 minutes of Pilates can transform your day and revolutionize your fitness journey. This exercise method, developed by Joseph Pilates in the early 20th century in New York City, has evolved into one of the most effective forms of strength training and mental conditioning. Why Choose Pilates? The benefits of Pilates extend far beyond just physical fitness. This comprehensive exercise method strengthens core muscles, improves mental health, and provides an excellent way to enhance daily movement patterns. Recent statistics show the global Pilates market valued at USD 152.3 billion in 2024, with a projected growth rate of 10.6%, confirming its rising popularity and effectiveness . The Benefits of Pilates Pilates offers a wide range of benefits that enhance both physical and mental well-being. Core strength is a primary focus, helping to stabilize the body and improve posture. This exercise method also promotes better flexibility and balance, which are essential for preventing injuriesand improving everyday movements. Additionally, Pilates can enhance muscle tone and promote weight loss, making it an excellent choice for those seeking a full-body workout. The mind-body connection cultivated through Pilates encourages mindfulness, reducing stress and improving mental health. Practicing Pilates regularly can also aid in rehabilitation by addressing muscle imbalances and enhancing range of motion. Overall, Pilates is a comprehensive fitness method that supports a healthy lifestyle and fosters a strong, resilient body. Your 15-Minute Power Session Preparation ● Find a quiet space with an exercise mat● Wear comfortable clothing● Have a resistance band nearby (optional)● Take deep breaths to center yourself Warm-Up (3 minutes) 1. Centered Breathing in Seated Position ● Sit tall, connecting your belly button to your spine● Focus on engaging your pelvic floor muscles● Take deep breaths, expanding your upper back and ribcage 2. Cat-Cow Stretch ● Begin in tabletop position● Alternate between arching and rounding your spine● Maintain a strong core throughout the movement READ MORE: A Complete Guide Yoga Routine for Better Sleep Core Sequence (7 minutes) 1. The Hundred ● Lie on your back, legs in a 90-degree angle● Lift your upper body, maintaining a straight line● Pump your arms while engaging your abdominal muscles● Hold for 100 counts (approximately 2 minutes) 2. Single Leg Lift Series ● Start with your right leg extended● Lift and lower with control● Repeat on the left side● Keep your lower back pressed into the mat 3. Side Leg Swing ● Lie on your right side● Lift your top knee while maintaining proper form● Switch to the left side● Focus on stabilizing your core muscles Standing Series (3 minutes) 1. Standing Balance ● Place hands on your right shoulder● Lift your right knee while maintaining balance● Alternate sides● Keep your upper body stable 2. Full Body Integration ● Stand in a strong stance● Use your right arm and left leg in coordinated movements● Switch to left hand and right leg● Maintain a straight line through your spine Cool Down (2 minutes) ● Gentle stretches focusing on different muscle groups● Deep stretch for the upper back● Recovery session for the pelvic floor muscles Your 15-Minute Weight Loss Routine Warm-Up (2 minutes) 1. Deep Breathing in Standing Position ● Take deep breaths while engaging your core muscles● Draw your belly button toward your spine● Activate your pelvic floor muscles 2. Dynamic Stretches ● Move from a standing position to a forward bend● Focus on maintaining a straight line through your spine● Engage your upper body while warming up your lower back High-Intensity Sequence (8 minutes) 1. The Hundred (2 minutes) ● Lie on your exercise mat● Lift your upper body and legs to a 90-degree angle● Pump your arms while maintaining a strong core● This exercise engages multiple muscle groups simultaneously 2. Alternating Leg Lifts (2 minutes) ● Start with your right leg● Maintain proper form throughout● Switch to your left leg● Keep your abdominal muscles engaged 3. Plank to Pike (2 minutes) ● Begin in tabletop position● Move to full plank● Pike hips up while maintaining a straight line● Return to starting position 4. Side Leg Series (2 minutes) ● Lie on your right side● Perform leg swings with your left leg● Repeat on the left side● Focus on controlled movements Core-Intensive Finale (4 minutes) 1. Rolling Like a Ball (1 minute) ● Balance on your sit bones● Keep your knees bent at a 90-degree angle● Roll back and forth with control● Maintain deep breaths throughout 2. Criss-Cross (1 minute) ● Target your abdominal muscles● Rotate from right elbow to left knee● Switch to left elbow to right knee● Keep your upper body lifted 3. Full Body Integration (2 minutes) ● Combine arm and leg movements● Maintain proper form● Focus on fluid, controlled movements● Engage your core muscles throughout Cool Down (1 minute) ● Return to a seated position● Focus on deep stretches● Release tension in your upper back● Practice recovery breathing Maximizing Your Results To optimize weight loss results, consider these expert tips: 1. Frequency Recommendations ● Perform this routine 3-4 times per week for optimal results● Combine with other forms of exercise for enhanced calorie burn 2. Progression Tips ● Start with basic movements and progress gradually● Add a resistance band as you build strength● Increase intensity over 2-3 weeks 3. Form Focus ● Maintain proper form throughout each exercise● Keep your core engaged during all movements● Focus on quality over quantity Expert Tips for Success According to certified Pilates instructors, proper form is crucial for maximizing benefits and preventinginjury. Here are some key points to remember: ● Keep your core engaged throughout all exercises● Maintain steady breathing patterns● Focus on quality over quantity in repetitive movements● Listen to your body and modify exercises according to your fitness levels The Science Behind the Success Studies show that consistent Pilates practice significantly improves core strength and stabilizes the body .This 15-minute session is designed to target all major muscle groups while
15 minutes at-home Pilates workout for full body Read More »